Creating an Entity Data Model in Entity Framework 6 DB-First Approach
Here, we are going to create an Entity Data Model (EDM) for an existing database in database-first approach and understand the basic building blocks.
Entity Framework uses EDM for all the database-related operations. Entity Data Model is a model that describes entities and the relationships between them.
Let's create a simple EDM for the School database using Visual Studio (2012\2015\2017) and Entity Framework 6.
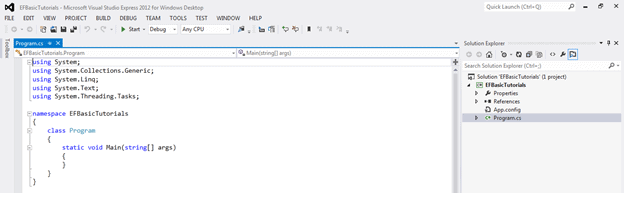
1. Open Visual Studio and create a console project.
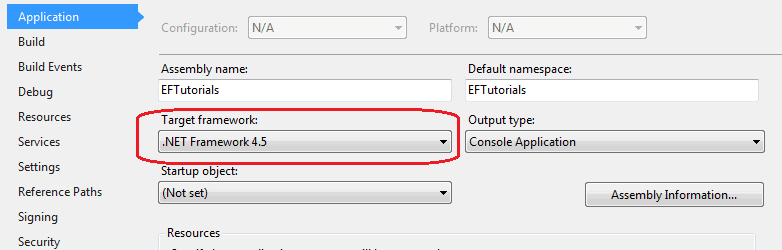
Go to PROJECT menu -> {project name} Properties.. - and make sure that the project's target framework is .NET Framework 4.5, as shown below.
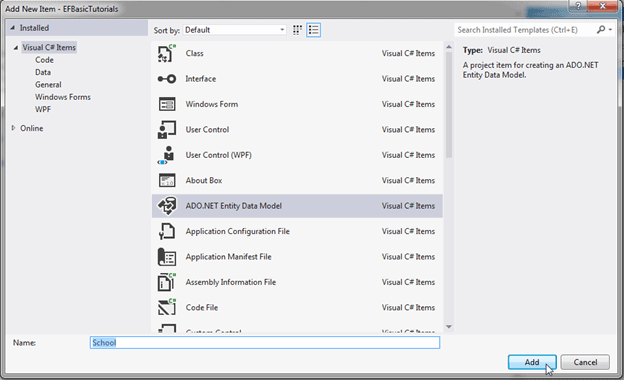
2. Now, add Entity Data Model by right clicking on the project in the solution explorer -> Add -> New Item. This will open the Add New Item popup. In the popup, select ADO.NET Entity Data Model and provide an appropriate name to the EDM ('School' in this case) and click the Add button.
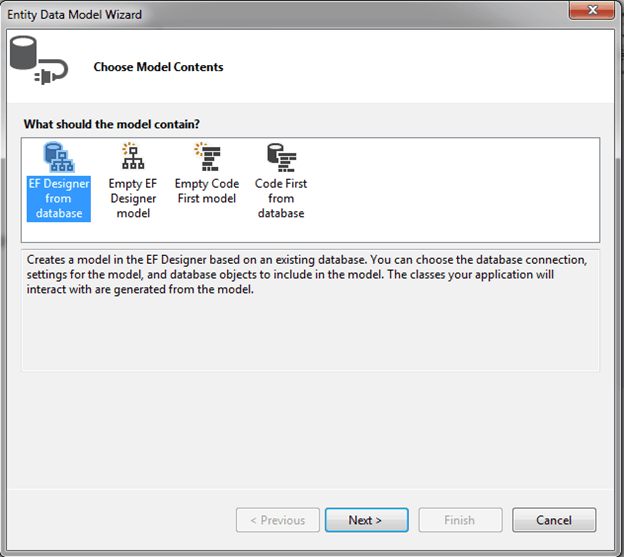
3. Entity Data Model Wizard in Visual Studio (2012/2015/2017) opens with four options to select from: EF Designer from database for the database-first approach, Empty EF Designer model for the model-first approach, Empty Code First model and Code First from database for Code-First approach. We are using database-first approach here, so select the EF Designer from database option and click Next.
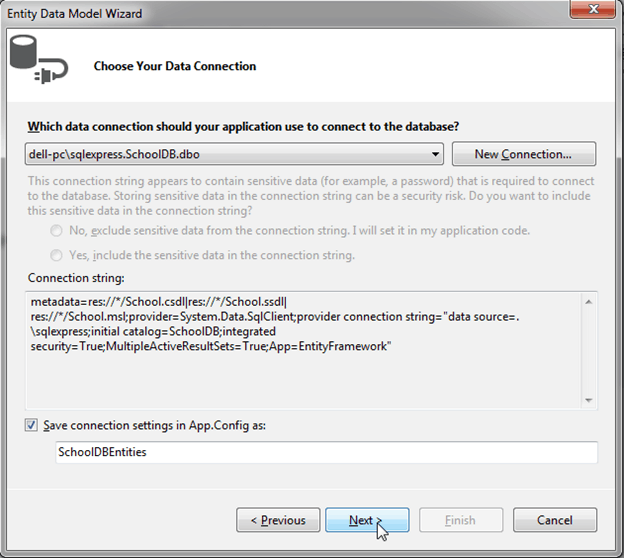
4. In this step, you need to create a connection with your existing database. If this is the first time you are creating an EDM for your database, then you need to create a new connection by clicking on the New Connection... button.

In the Connection Properties popup, provide the server name (. for the local database) and select your database name and click the OK button.
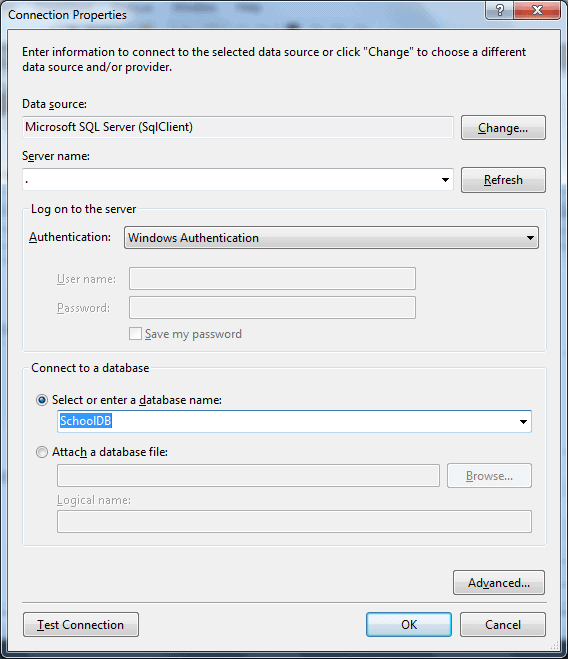
This will add a connection string to your app.config file with the <DB name>Entities name.
Click Next after you set up your DB connection.
5. In this step, you need to choose the version of Entity Framework. We will use Entity Framework 6.0 in the basic tutorials so select Entity Framework 6.0 and click Next.
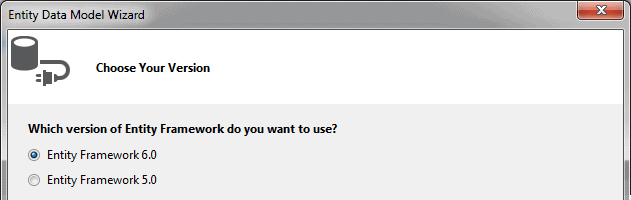
Note: If you already have installed the latest version of Entity Framework using NuGet manager, then this step of the wizard will no longer appear.
6. Next step will display all the Tables, Views and Stored Procedures (SP) in the database. Select the Tables, Views and SPs you want, keep the default checkboxes selected and click Finish. You can change the Model Namespace if you want.
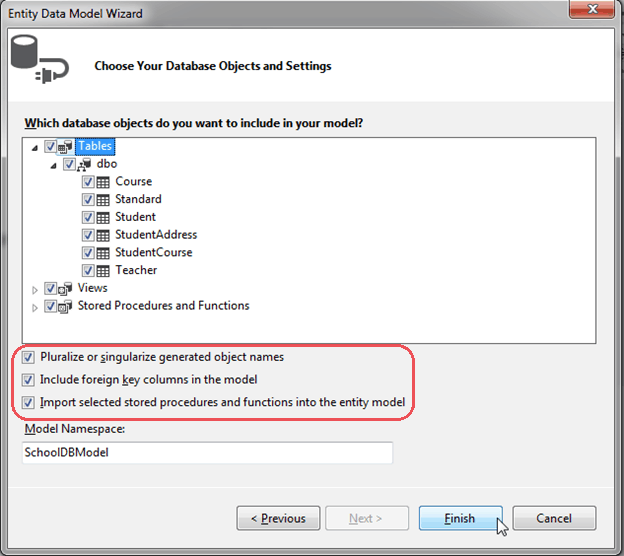
Pluralize or singularize generated object names checkbox singularizes an entityset name, if the table name in the database is plural.
For example, if the SchoolDB database contains the Students table name, then entity set would be singular Student.
Similarly, relationships between the models will be pluralized if the table has a one-to-many or a many-to-many relationship with other tables.
For example, the Student table has many-to-many relationship with Course table, so the Student entity set will have plural name Courses for the collection navigation property of Course type.
The second checkbox, Include foreign key columns in the model, includes a foreign key property explicitly to represent the foreign key.
For example, the Student table has a one-to-many relationship with the Standard table.
To represent this in the model, the Student entityset includes a StandardId property with Standard reference navigation property.
If this checkbox is unchecked, then it will only include the Standard reference navigation property, but not the StandardId.
The third checkbox, Import selected stored procedures and functions into entity model, automatically creates Function Imports for the stored procedures and functions. You don't need to import functions manually, like it was necessary prior to Entity Framework 6.0.
7. After clicking on Finish, a School.edmx file will be added into your project.
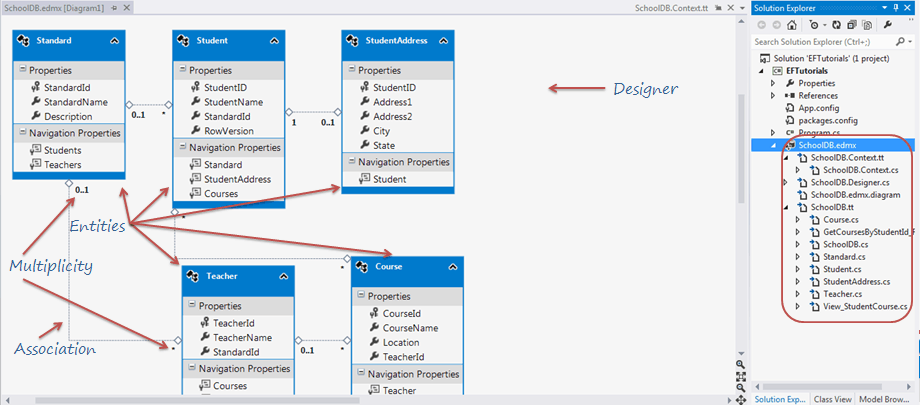
Open EDM designer by double clicking on School.edmx. This displays all the entities for the selected tables and the relationships between them, as shown below:
EDM adds the provider and connection string settings in the App.config file, as shown below:
<?xml version="1.0"?> <configuration> <configSections> <!-- For more information on Entity Framework configuration, visit http://go.microsoft.com/fwlink/?LinkID=237468 --> <section name="entityFramework" type="System.Data.Entity.Internal.ConfigFile.EntityFrameworkSection, EntityFramework, Version=6.0.0.0, Culture=neutral, PublicKeyToken=b77a5c561934e089" requirePermission="false"/> </configSections> <startup> <supportedRuntime version="v4.0" sku=".NETFramework,Version=v4.5"/> </startup> <entityFramework> <defaultConnectionFactory type="System.Data.Entity.Infrastructure.SqlConnectionFactory, EntityFramework"/> <providers> <provider invariantName="System.Data.SqlClient" type="System.Data.Entity.SqlServer.SqlProviderServices, EntityFramework.SqlServer"/> </providers> </entityFramework> <connectionStrings> <add name="SchoolDBEntities" connectionString="metadata=res://*/SchoolDB.csdl|res://*/SchoolDB.ssdl|res://*/SchoolDB.msl;provider=System.Data.SqlClient;provider connection string="data source=.\sqlexpress;initial catalog=SchoolDB;integrated security=True;multipleactiveresultsets=True;application name=EntityFramework"" providerName="System.Data.EntityClient"/> </connectionStrings> </configuration>
Thus, you can create an Entity Data Model file (.edmx) for your existing database.
You can open an EDM designer in XML view where you can see all the three parts of the EDM: Conceptual schema (CSDL), Storage schema (SSDL) and mapping schema (MSL), together in XML view.
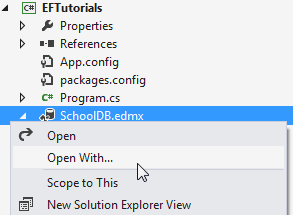
Right click on School.edmx -> click 'Open with..', this will open a popup window.
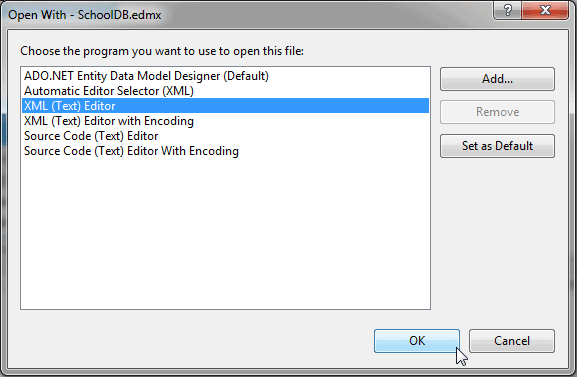
Select 'XML (text) Editor' in the popup window.
Visual Studio cannot display the model in Design view and in XML format at the same time, so you will see a message asking whether it's OK to close the Design view of the model, click Yes. This will open the XML format view. You can see the following XML view by toggling all outlining as shown below.
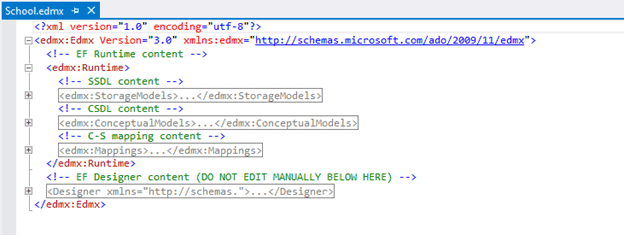
You can see the SSDL content, the CSDL content and the C-S mapping content here. If you expand the SSDL and CSDL, each one has some common XML node under each schema node. You don't need to edit the xml data because this can be accomplished easier in the Model Browser.
Now, let's examine all the building blocks of the generated EDM (School.edmx) as shown in the above figure.
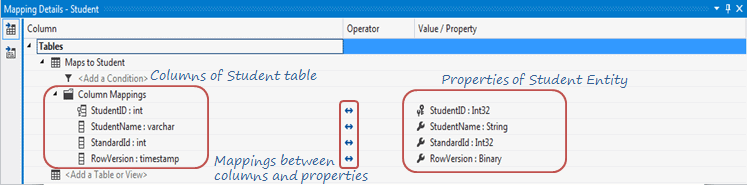
Entity-Table Mapping
Each entity in EDM is mapped with the database table. You can check the entity-table mapping by right clicking on any entity in the EDM designer -> select Table Mapping. Also, if you change any property name of the entity from designer then the table mapping would reflect that change automatically.
Context & Entity Classes
Every Entity Data Model generates a context and an entity class for each database table.
Expand the .edmx file in the solution explorer and open two important files, <EDM Name>.Context.tt and <EDM Name>.tt, as shown below:
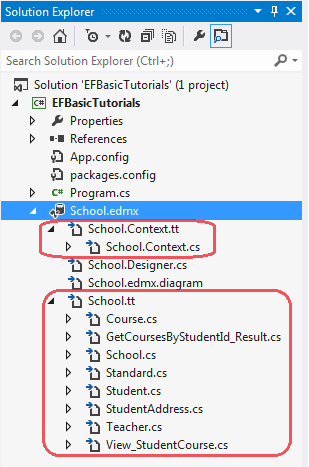
School.Context.tt: This T4 template file generates a context class whenever you change the Entity Data Model (.edmx file). You can see the context class file by expanding School.Context.tt.
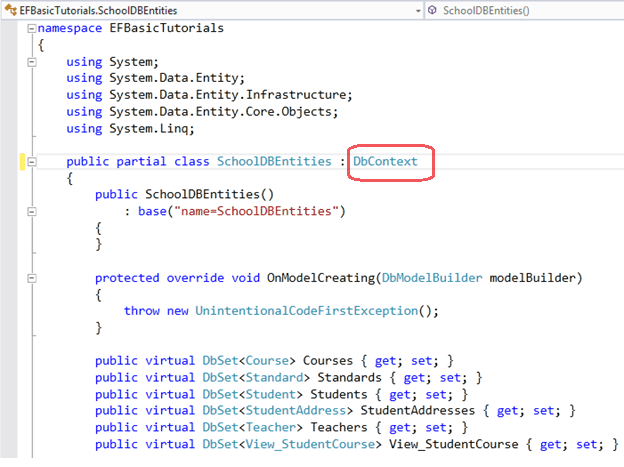
The context class resides in the <EDM Name>.context.cs file. The default context class name is <DB Name>Entities.
For example, the context class name for SchoolDB is SchoolDBEntities and derived from the DBContext class.
School.tt: School.tt is a T4 template file that generates entity classes for each DB table. Entity classes are POCO (Plain Old CLR Object) classes. The following code snippet shows the Student entity.
public partial class Student
{
    public Student()
    {
        this.Courses = new HashSet<Course>();
    }

    public int StudentID { get; set; }
    public string StudentName { get; set; }
    public Nullable<int> StandardId { get; set; }
    public byte[] RowVersion { get; set; }

    public virtual Standard Standard { get; set; }
    public virtual StudentAddress StudentAddress { get; set; }
    public virtual ICollection<Course> Courses { get; set; }
}
Learn how to see all the objects of EDM using the Model Browser in the next section.
